Noticing weak airflow from your vents or a dusty smell inside your car?
Your cabin air filter is likely overdue for a swap—and ignoring it directly impacts your vehicle’s HVAC performance and the air quality you breathe every day.
The good news? You don’t need to pay a repair shop top dollar for a simple five-minute job.
In this complete guide, you’re going to learn exactly how to change cabin air filter step-by-step, spot the key warning signs, choose the right replacement, and save money doing it yourself.
What Does a Cabin Air Filter Do?
As a dedicated cabin air filter manufacturer, we know that a clean vehicle air filter is essential for a safe, comfortable ride. The cabin air filter acts as your vehicle’s primary defense system, clearing the air that enters the passenger compartment through the HVAC system.
Primary Functions and Air Quality Benefits
Understanding how to change cabin air filter units begins with recognizing why this component is vital. It directly impacts car interior air quality and passenger comfort:
- Traps Harmful Airborne Particles: Blocks dust and pollen, mold spores, smog, and road debris before they enter the cabin.
- Eliminates Unpleasant Odors: High-performance filter media neutralizes foul odor and persistent musty smell issues inside the car.
- Protects HVAC Performance: Prevents dirt buildup on the AC blower motor and heater core, reducing system strain.
- Promotes Respiratory Health: Maintains clean air circulation, supporting effective allergic reaction prevention for all passengers.
Cabin Air Filter vs. Engine Air Filter
While both components are critical to regular maintenance, they protect completely different parts of your vehicle:
| Feature | Cabin Air Filter | Engine Air Filter |
|---|---|---|
| Primary Function | Purifies air entering the interior cabin | Purifies air entering the combustion chamber |
| Location | Typically behind the glove box or under the dash | Located inside the engine bay air filter housing |
| System Impact | Improves car interior air quality and HVAC flow | Protects engine performance and fuel economy |
| Main Debris Filtered | Dust and pollen, soot, mold, odors | Dirt, gravel, leaves, heavy road dust |
When to Replace Your Cabin Air Filter
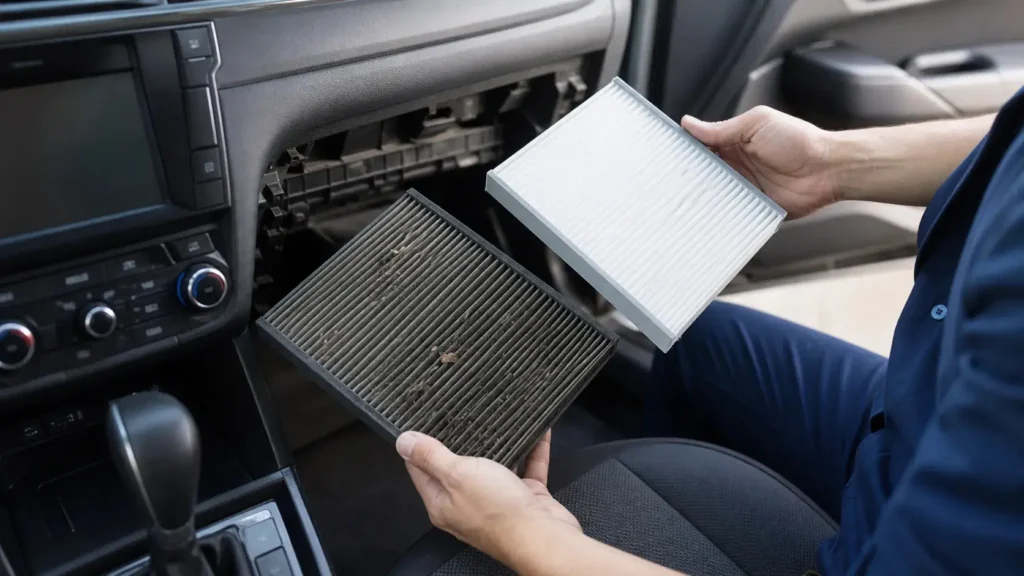
Knowing when to service your vehicle keeps your car’s interior air quality high and prevents unnecessary wear on your climate control components.
Recommended Replacement Intervals
As a general rule, we recommend following a regular replacement schedule for your filter to maintain peak performance:
- Standard Interval: Every 12,000 to 15,000 miles (or once every 12 months).
- Severe Driving Conditions: Every 6,000 to 10,000 miles if you frequently drive on dirt roads, through high-traffic urban centers, or in areas with severe seasonal pollen.
Understanding what a cabin air filter does makes it clear why sticking to a consistent timeline is essential for a clean cabin environment.
Signs Your Cabin Air Filter Needs Replacing
If you are not tracking mileage closely, your vehicle will show distinct symptoms when the media becomes clogged. Watch for these primary indicators:
- Foul Odor or Musty Smell: A persistent stale smell coming from the vents whenever the AC or heat is running.
- Severe Airflow Restriction: Noticeably weak air pressure flowing out of your climate vents.
- Excessive Vent Noise: A noisy or straining AC blower motor forced to pull air through clogged debris.
- Rapid Dust Accumulation: Increased buildup of dust and pollen on your dashboard and interior trim.
If your filter is severely blocked, you might wonder if you can run without a cabin air filter short-term. However, driving without one leaves your HVAC system unprotected, so learning how to change cabin air filter units early is always the safest choice.
Tools and Materials Needed for Replacement
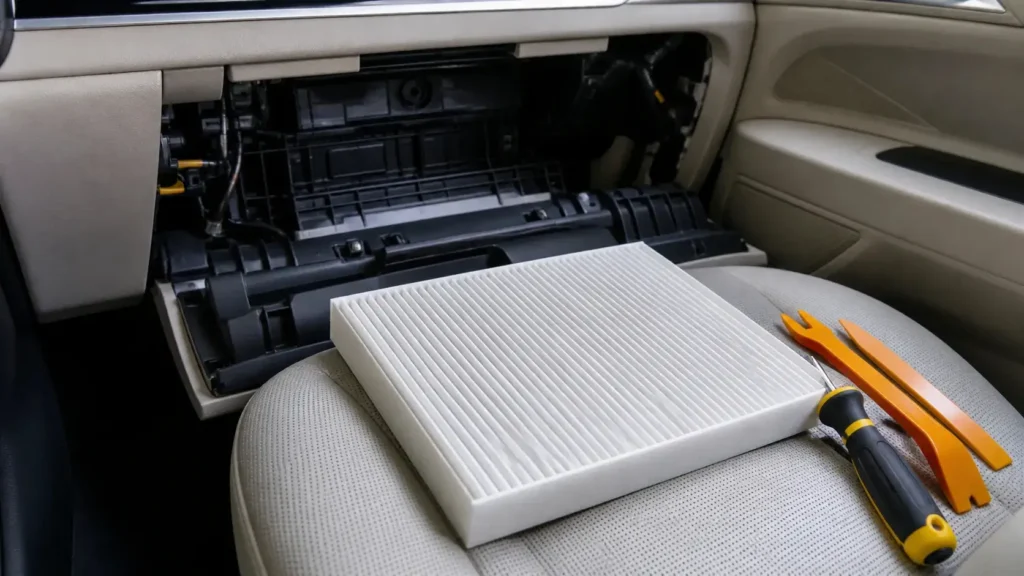
Tackling a cabin air filter replacement yourself requires minimal equipment. Having the right tools on hand ensures a smooth process without damaging delicate glove box components or your HVAC system.
Required Tools and Safety Gear
Most vehicles require basic hand tools to open the filter compartment. Here is what you need before getting started:
| Category | Item | Purpose |
|---|---|---|
| Tools | Screwdrivers (Phillips / Torx screws) | Unfasten housing covers or glove box retainers |
| Tools | Plastic trim removal tool | Safely detach plastic clips and the glove box damping lever |
| Safety | Dust mask | Block dust and pollen released when pulling out the old filter |
| Safety | Protective gloves | Keep hands clean from trapped dirt and road debris |
How to Choose the Right Replacement Filter
Selecting the right vehicle air filter depends on your driving environment and health needs. As a cabin air filter manufacturer, we engineer filter media to balance filtration efficiency with proper airflow:
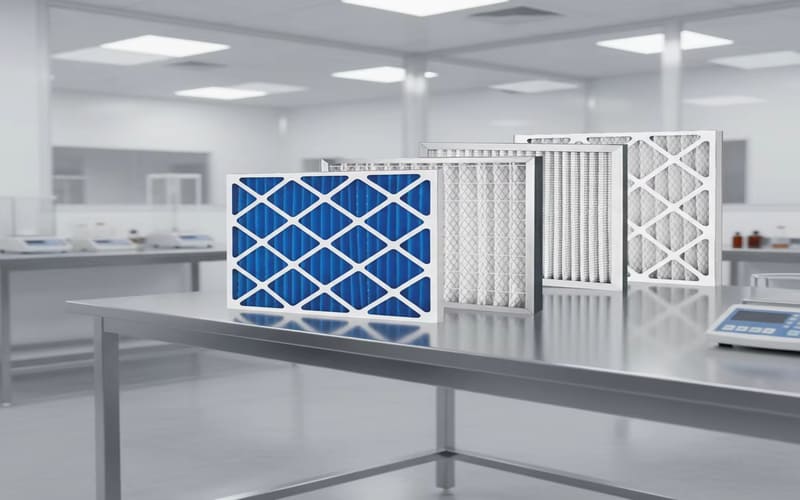
- Standard Particulate Filters: Best for basic dust and pollen removal while keeping maximum airflow to your ac blower motor.
- Activated Carbon Filters: Recommended if you struggle with persistent exhaust fumes, a foul odor, or a musty smell in your cabin. Upgrading to an activated carbon filter neutralizes gases and improves car interior air quality.
- HEPA Filters: Provides superior allergic reaction prevention by capturing ultra-fine microscopic contaminants.
Always check your vehicle owner’s manual for the exact filter size. Selecting high-quality media prevents excessive airflow restriction while keeping your air conditioning system running reliably. Take time to evaluate media performance by comparing filters for resistance and efficiency to get the ideal match for your car.
How to Change a Cabin Air Filter: Step-by-Step Guide
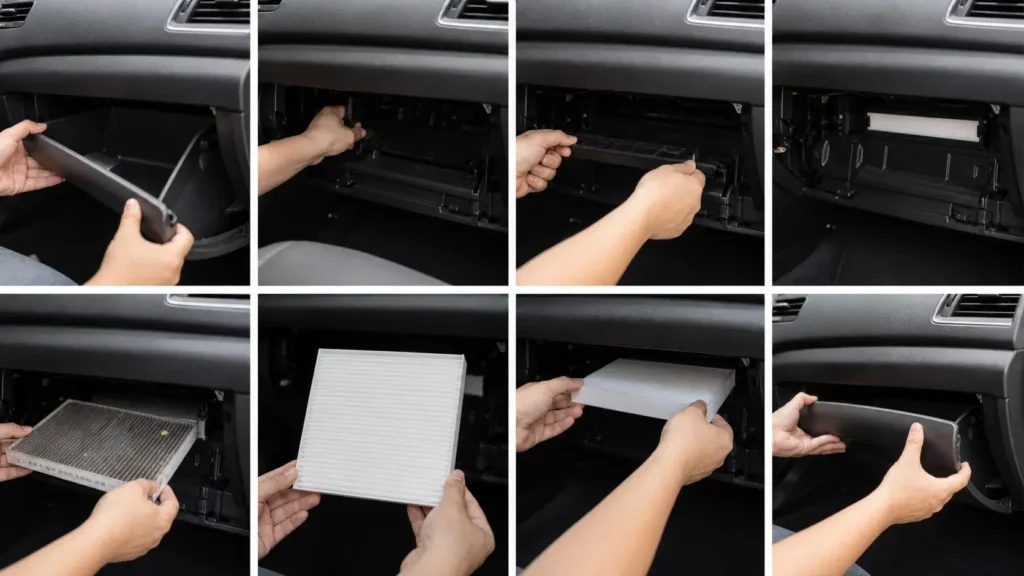
Swapping out your old filter is one of the easiest DIY jobs you can tackle. Learning how to change cabin air filter units takes under 15 minutes for most vehicles and requires minimal tools. Follow this quick, straightforward step-by-step guide to restore fresh airflow inside your cabin.
Step 1: Locate the Cabin Air Filter Housing
For most modern passenger cars, the filter compartment is situated directly behind the glove box. In select models, you might find it under the dashboard on the passenger side or under the hood near the windshield intake. If you need help finding yours, read up on where the air filter is located across various vehicle designs.
Step 2: Access and Remove the Old Air Filter
Once you have identified the location, follow these quick access steps: Clear the glove box: Empty out all items inside so nothing falls out. Disconnect the damping lever: If your vehicle has a small plastic arm on the outer right side of the glove box, unhook it. Release the stoppers: Push inward on both sides of the glove box to allow it to drop down fully. Remove the access cover: Unclip the plastic access door on the air filter housing. Some European or heavy-duty models may require removing a few Torx screws or plastic clips. Remove the filter: Slide the dirty filter straight out. Note which direction the printed airflow arrows are pointing before discarding it.
Step 3: Clean the Housing Box
Before sliding in a new unit, take a quick look inside the housing. Leaves, twig bits, and heavy dust often collect at the bottom of the tray. Vacuum or wipe out any loose particles to prevent airflow restriction and keep debris from falling straight into your blower motor. If you ever need to service reusable filter screens in your vehicle, check out our guide on how to clean air filter step by step.
Step 4: Install the New Filter and Secure the Housing
- Align the airflow direction: Slide the new filter into place, making sure the directional arrows match the original setup (typically pointing downward toward the floor).
- Seal the compartment: Snap the plastic door back onto the housing box until it clicks securely.
- Reassemble the glove box: Lift the glove box back into place, re-engage the side stoppers, and reconnect the damping lever.
- Test the airflow: Turn on your vehicle’s fan to verify full air velocity and make sure there are no unusual whistles or vibrations.
Benefits of Changing Your Cabin Air Filter Yourself
As a dedicated cabin air filter manufacturer, we always encourage drivers to take charge of their own diy car maintenance. Learning how to change cabin air filter components on your own gives you complete control over your maintenance schedule while ensuring you install premium-grade filters every time.
Cost Savings Compared to Professional Service
Dealerships and repair shops often charge steep labor fees for a routine cabin air filter replacement that takes under ten minutes. By cutting out the middleman, you eliminate unnecessary service charges while securing a top-quality vehicle air filter.
| Service Option | Estimated Cost | Time Spent |
|---|---|---|
| Dealership / Repair Shop | $50 – $100+ | 1 – 2 Hours |
| DIY Replacement | $15 – $25 | 5 – 10 Minutes |
Evaluating how much a cabin air filter should cost helps you maximize your savings while preserving optimal car interior air quality.
Improved Airflow and HVAC Performance
Replacing a saturated filter removes airflow restriction and allows your HVAC system to operate at peak efficiency. When debris clogs the filter compartment, your ac blower motor works overtime, increasing component wear and reducing cabin comfort.
- Boosted System Efficiency: Maximizes airflow so your air conditioning system cools or heats the cabin rapidly.
- Protects Equipment: Stops trapped debris from damaging downstream blower components.
- Fresher Cabin Environment: Recognizing the signs your HVAC filter is clogged helps you keep air circulating smoothly and cleanly.